Organising Active Directory for Users and Computers
Organising Active Directory is a very powerful and flexible way to manage your school network. In this tutorial, we are going to create a basic structure that will allow us to manage both users and computers in a single branch. Open Active Directory Users and Computers, by following the links in the Administrative Tools Start…
Organising Active Directory is a very powerful and flexible way to manage your school network. In this tutorial, we are going to create a basic structure that will allow us to manage both users and computers in a single branch.
Open Active Directory Users and Computers, by following the links in the Administrative Tools Start menu in Windows Server 2003.

The above picture shows an unconfigured Active Directory structure. Before we go to far into creating our own structure, it is important to understand why Microsoft has created a default structure. In the old days before Active Directory, NT4 used to make a distinction between groups and users and that was it. Active Directory changed the landscape by showing Users and Groups in the same place. Allowing an administrator to keep users and specific security groups together.
The Default Active Directory structure has the following containers;
- Built-in: Contains Domain-Local security groups, such as Administrators, Users and Guests.
- Computers: The Default location where computer accounts are created when a machine joins the domain.
- Domain Controllers: The Default location for servers that are network Domain Controllers.
- ForeignSecurityPrinciples: A container used for storing Domain Trust account details.
- Users: Contains the Administrator account as well as Global Security Groups.
Whilst this structure is ok, it has one flaw. The containers don’t allow Group Policy Objects to be applied to them. If you wanted Group Policy, it would have to be applied to the entire domain, restricting what you could do.
A simple extension to the Active Directory gives a lot more configuration choices and a better way of organising Active Director to manage school users and machines.
Create a Managed Organisation Unit (OU)
Right click on the Domain level branch of the Active Directory structure. On my domain, I have right clicked on schooltech.local. Choose New > Organisation Unit.
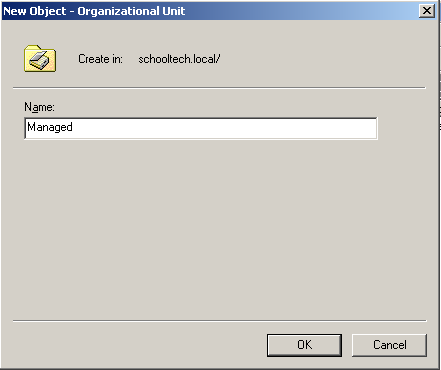
Enter the name of your OU, I have called my Managed, as I am going to use this to manage the entire structure of my network. Click OK and you will see the new OU inside of Active Directory Users and Computers.
Computers Area
- Right click on the Managed OU. Create a New OU called Computers.
We now have a structure that contains an area for our school computers. We can now begin adding further detail, added more layers as appropriate.
For Example;
- Managed > Computers > Admin
- Managed > Computers > Admin > Finance
- Managed > Computers > Admin > Reception
- Managed > Computers > Library
- Managed > Computers > Room M29
- Managed > Computers > Science Lab 1
You can think of the Computers Organisational Unit as the various locations in your school. You can make them as complex or as simplistic as you need.
What are the Advantages of Managed > Computers?
There are several advantages of using this approach. You can use the locations to keep track of computers. Active Directory Group Policy will also come into its own, allowing you to assign software to the whole site, or individual rooms. You can also assign printers to areas or rooms using Group Policy.
Hopefully you can see how this approach will apply to your individual school needs, although you might not fully appriciate putting in all this work until you learn a little more about Group Policy.
Users Area
The same approach can be applied to network users in the school. You can separate Administration staff, teachers, network support and students from each other.
Right click on the Managed OU. Create a New OU called Users.
We now have a structure that contains an area for our school computers. We can now begin adding further detail, added more layers as appropriate.
For Example;
- Managed > Users > Students
- Managed > Users > Students > Year 7
- Managed > Users > Students > Year 7 > 7KMB
- Managed > Users > Students > Year 7 > 7PMD
- Managed > Users > Students > Year 7 > 7TMW
- Managed > Users > Students > Year 8
- Managed > Users > Staff
- Managed > Users > Staff > School Admin
- Managed > Users > Staff > Teachers
- Managed > Users > Staff > Teaching Assistants
- Managed > Users > Technicians
In the example above, I have deliberately used areas such as “Year 7” so that you can see the context of how this structure could be used. However you will find it much easier to use the Intake Years, that way you won’t need to spend hours moving files and changing groups of users around.
For example in the current year 2008. The intake started in September 2007, so all students who started between Sept 2007 and June 2008 will permanatly live in the 2007 OU. I used to keep a helpful note which I kept updated each year, that would map Year 7 to 2007, Year 8 to 2006 etc.
I have implemented an example structure in my Active Directory forest which best matches my needs. I have also designed the structure so that it closely matches the folder structure that I have created on the server hard drive.
