Increasing the size of your MFT

Create a large MFT on a new Windows NTFS volume.

Why would anyone want to increase the size of the Windows NTFS Master File Table (MFT)?

In my experience the Master File Table can become fragmented over time.  Fragmentation can be caused by several circumstances ranging from how busy to the number of small files are stored on the volume.  The built in Windows defragger can defragment the Master File Table, it will invariably get into difficulties when the volume is reaching capacity.

Preparing a Volume

To help mitigate the fragmentation of the MFT the simple answer is to cause the Master File Table to bloat on a freshly formatted volume.  If you bloat the MFT large enough it should remain in a single lump on the hard drive for the lifetime of the volume.  This should mean that overall, there will be less fragmentation of the Master File Table and a performance boost.

In my work, I have servers which hold millions of tiny files.  I needed to have a large Master File Table from the outset to prevent future problems.  I’ve created a free .NET application that will create a hierarchy of nested folders on a drive and delete them again when finished.  Creating folders seems is the easiest method of artificially causing the Master File Table to grow.  Each folder seems to create a 1024kb entry (1GB of MFT = 1,024,000 folders or files).  You can check the size of your MFT by using the Sysinternals Tool – NTFSINFO.exe available from http://live.sysinternals.com/NTFSINFO.EXE.
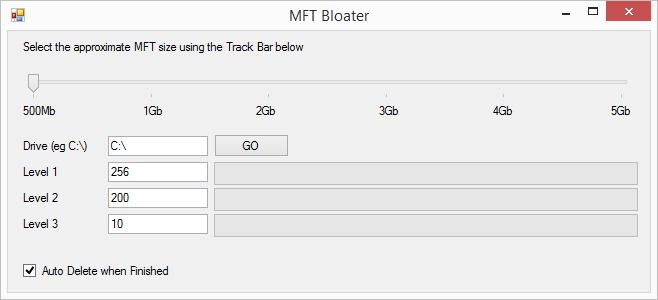
MFTBloater

The application is pre-configured, and you can also change the number of levels before you click the Go button.  As a single threaded application, it may take some time to do its stuff.  It may appear as if the application has crashed and will max out a single core of your CPU.  Once the application has finished, defrag the volume so that the MFT is organised towards the front of the disk.  Ultra-defrag available on Source Forge has an “Optimise MFT” action that will consolidate the MFT.

Similar Posts

  • Creating Partitions for Shared Areas and User Home folders

    If you want to make use of Disk Quotas and Remote Installation Deployment tools, you will need to have separate partitions/drives to store the areas on.  It is generally good practice to have at least 2 or more partitions on your Windows Server 2003 machine.

  • GPOGUY.com – Group Policy Stuff

    Whilst surfing the net looking for information on using Group Policy to set workstations power options so that they would not go into standby. I came across a website that had programs, links and valuable resources for Group Policy.

  • Adding DHCP to your Windows Server 2003

    DHCP is a service that is responsible for assigning IP addresses to computers on your network.  Using DHCP takes the hassle out of managing your network IP addresses.  DHCP is an essential part of using the PXE boot feature of your computers network card.

  • Installing a new Windows Server 2003 Domain

    Getting a company to setup and install your network will always be easier than planning and deploying your own network solution, but if you have the time and are willing to learn then you can save your school some money.  This guide will attempt to help you to setup a Windows Server 2003 Domain for…

  • Configure Server 2012 R2 Server

    Once you have installed Windows Server, it is time to configure Server 2012.  You will need to perform some common house keeping to make it usable within your network.  In this tutorial you will learn how to set the computer name and IP Address. There are a number of methods that can be used to…

  • Install the Windows Recovery Console for Server 2003

    Some times it is necessary to boot into the recovery console to repair your server installation or run a chkdsk.  Normally you would boot from the installation CD and choose the relevant boot options.  However you can also install the Recovery Console to the system partition so that you can boot into the recovery console…