Adding DHCP to your Windows Server 2003
DHCP is a service that is responsible for assigning IP addresses to computers on your network. Using DHCP takes the hassle out of managing your network IP addresses. DHCP is an essential part of using the PXE boot feature of your computers network card. Resources Required: A Windows 2003 Server (see Installing a Windows Server…
DHCP is a service that is responsible for assigning IP addresses to computers on your network. Using DHCP takes the hassle out of managing your network IP addresses. DHCP is an essential part of using the PXE boot feature of your computers network card.
Resources Required:
- A Windows 2003 Server (see Installing a Windows Server 2003 Domain)
- Windows Server 2003 Installation CD
DHCP = Dynamic Host Configuration Protocol, and can be used for much more than simply assigning and managing your network IP addresses. It can be used for providing network information to your workstations, such as Domain Name Servers, Domain Name, Time Servers, Logon Servers and much more.
Ranges of IP addresses are defined as a Scope. DHCP servers can have Global options that apply to every IP address managed by the DHCP server, or can be applied to the individual Scope. Configuration that is applied to the individual scope overrides the information provided by the Server.
Installing DHCP on your Windows Server 2003
Log onto the Server as an Administrator User. Then start the Add and Remove Programs Control panel applet.
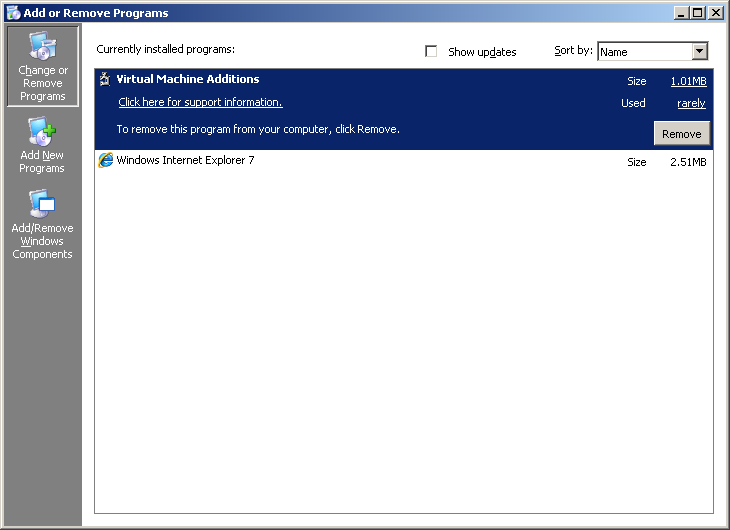
Choose the option on the left hand side, called Add/Remove Windows Components. After a short delay, a new dialog box will be displayed.
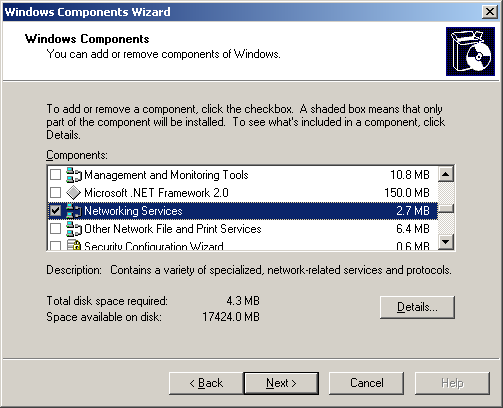
Browse down and find the Networking Services option. Select it, then click the Details button.
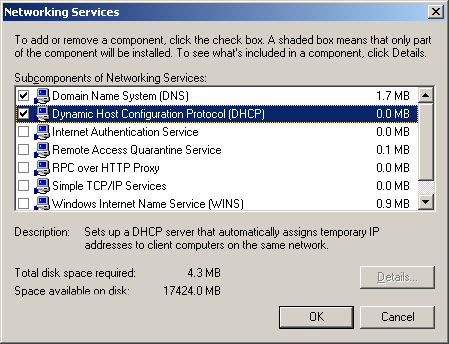
Place a Tick in against Dynamic Host Configuration Protocol (DHCP), and then click OK. Click Next to begin the installation. At the end of the installation, press Finish to continue.
NOTE: Windows may require the Server Installation CD-ROM to complete the installation of the DHCP Service.
Close the Add and Remove Control Panel.
Configuring DHCP
You are now going to use the DHCP administration Applet to configure and enable DHCP for your network Server. Click Start > Administrative Tools, then Choose DHCP.
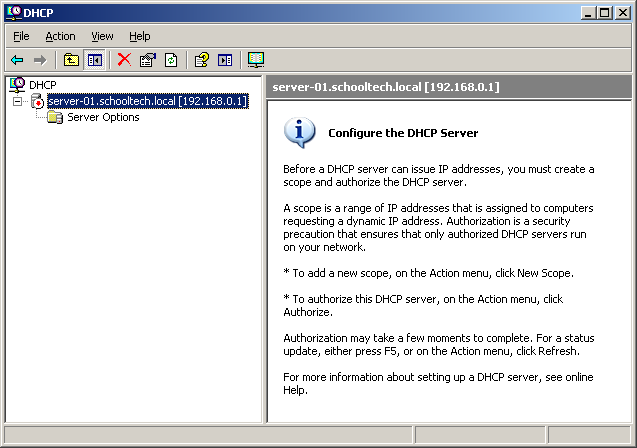
You are now going to add a new DHCP Scope, by Right Clicking on the named server, then choosing New Scope. A wizard will begin. Click Next at the welcome page.
Type a name and description for the new Scope. This name could be for a VLAN or just simply the name of the school. Then click Next.
At the next page, enter the IP address information. The Addresses that you enter should not include the server IP address or the Gateway/Router IP Address. Doing so will cause unexpected problems at a later date. The Start and End Addresses should be on the same subnet as your Domain Controller/File Server.
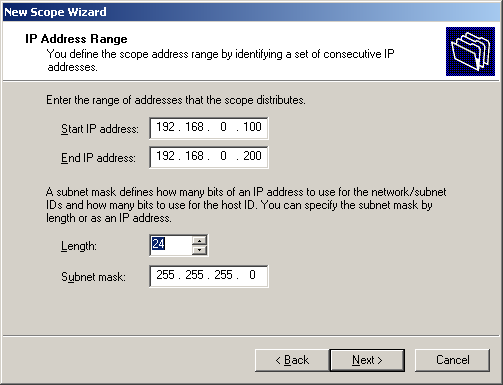
Once you have entered your required IP information, click Next to continue.
At this point you can now add any exclusions. For example you have an RM SmartCache or Espresso box on your network that is difficult to reconfigure. Using the exclusions you can ensure that the IP addresses of those machines are never handed out to other machines.
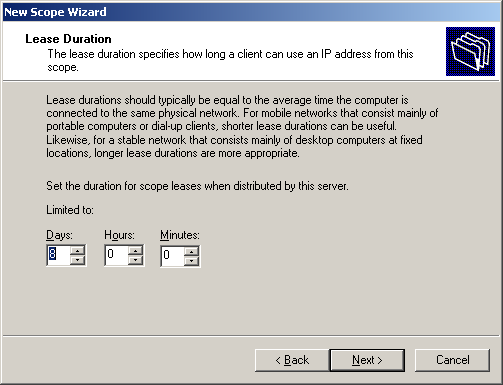
Each IP address that is handed out by the DHCP server will have a lease. Choose an appropriate time for the lease to be valid. When a lease expires, the IP address will be available for other computers. Although the original computer will normally request the same IP address that it had before.
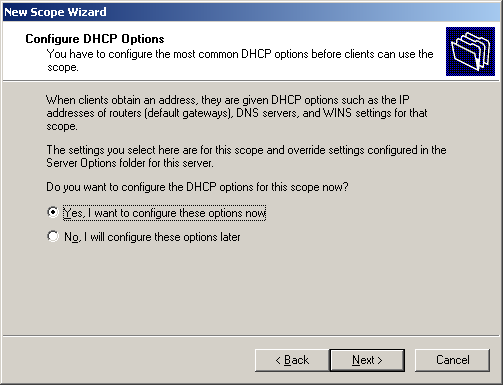
If you know the remaining configuration details for the scope, choose Yes and enter these details on the preceding pages.
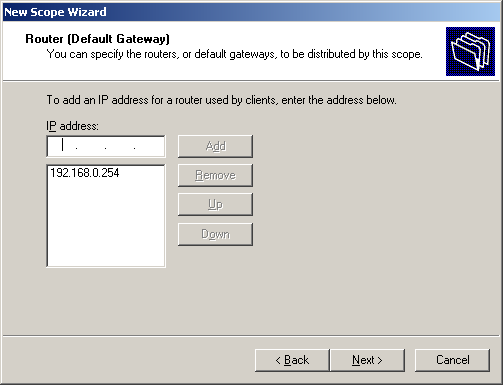
Enter a Router/Gateway address, and then click Next.
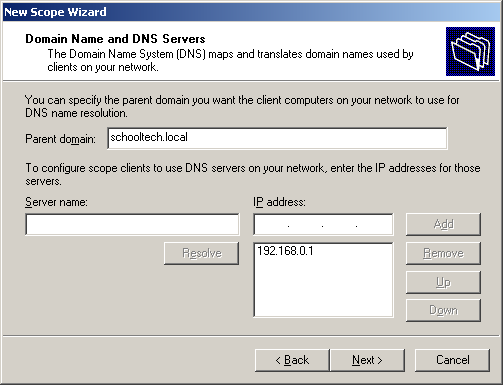
Enter details about the internet domain name (the schools Active Directory name) and the local DNS Servers. The local DNS Server will usually be the Active Directory Domain Controller. Click Next.
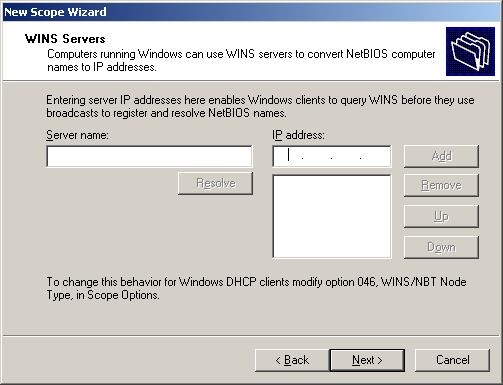
Enter a WINS Server if you have set this up. WINS is an older Windows version of DNS. This is no longer required for operating a Windows Network. You can leave this empty.
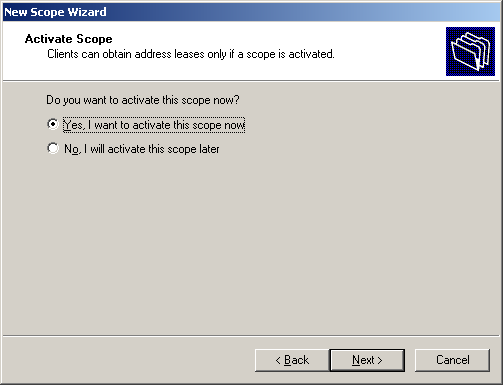
Finally choose to Activate the Scope at the end of the Wizard.
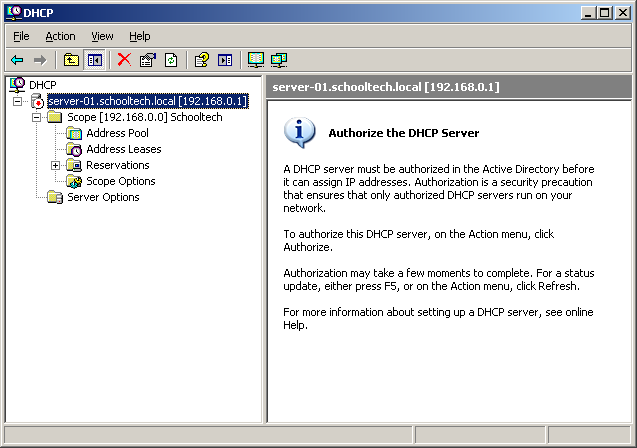
Once the scope has been created you will, need to authorise the DHCP Server so that it can start to assign network IP addresses to your workstations. This process can take a few minutes to complete.
NOTE: There most only be one DHCP server on your network. Multiple DHCP servers will result in conflicts occurring that could prevent machines connecting to the right server to logon.
Your DHCP server is now active and will be assigning IP addresses to new workstations.
You can see which IP addresses have been allocated by using the DHCP applet and browsing to the Address Leases branch of the relevant scope.