
Creating Partitions for Shared Areas and User Home folders
If you want to make use of Disk Quotas and Remote Installation Deployment tools, you will need to have separate partitions/drives to store the areas on. It is generally good practice to have at least 2 or more partitions on your Windows Server 2003 machine. Using partitions allows for the logical grouping of files and…
If you want to make use of Disk Quotas and Remote Installation Deployment tools, you will need to have separate partitions/drives to store the areas on. It is generally good practice to have at least 2 or more partitions on your Windows Server 2003 machine.
Using partitions allows for the logical grouping of files and resources, this should also make disaster recovery simpler to implement. By keeping Operating System files separate from the data side of things, you could take a backup of your Operating System partition on DVD for quick recovery by using something like Ghost to make the DVD. Restoring System state can then be done from the last tape or online backup. Taking the approach could reduce the downtime of the server.
If you have followed the guide for installing a new 2003 server, then you will already have left sufficient space on your hard drives to allow for the creation of new partitions. Once partitions have been assigned, they can’t be changed easily without the use of specialise software, or wiping them out and starting again.
In this article I will be creating 2 new partitions, E: for my User Home directories and G: for my shared applications space, remote installation space and Software deployment.
To access the Disk Management utility in Windows Server 2003; follow the menu route Start > Administrative Tools > Computer Management. This will load up the Computer Management console.
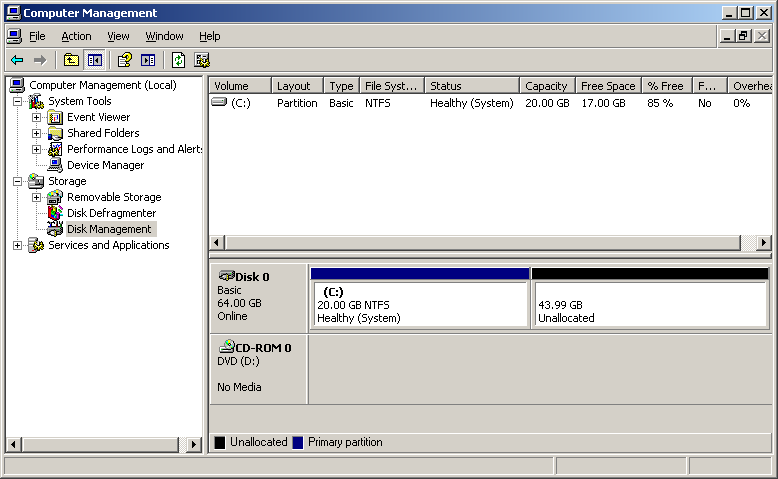
Under the storage branch, choose Disk management. A visual representation of the available disk drives along with allocated and free space is displayed.
In the example above, 20 GB has been allocated to the C: drive. This is the Operating System drive which is used to store Windows Server 2003 and other Server/service applications.
Create a New Partition
Using the Disk Management utility, right click in the Unallocated disk space, then choose New Partition. A wizard will be started, click Next at the Welcome page.
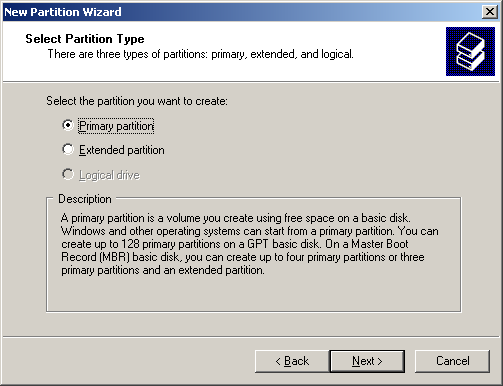
Choose the type of partition that you would like to use. In most cases a Primary partition will be sufficient; however it is not possible to have any more than 4 partitions on a normally formatted hard drive.
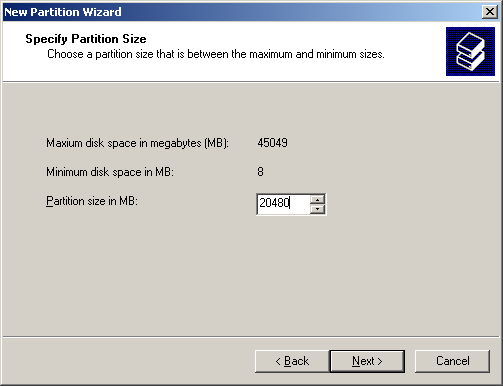
On the next page, choose how much space you want to allocate to the new partition. If you have no other uses for the remaining space on the disk, then allow the Wizard to use all of the available space. In this example I am going to allocate 20GB (1024 x 20 = 20480Mb).
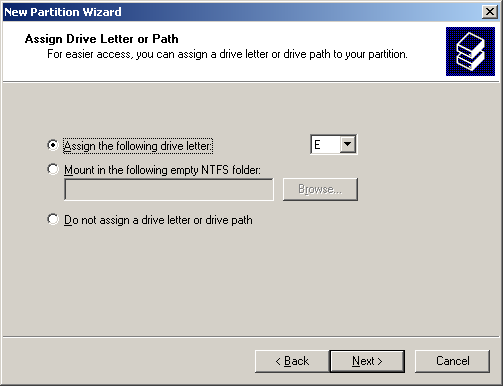
Choose a drive letter to assign to the new partition. I have already planned on using the letter E: for this new drive, but you could choose something that makes the most sense to you. For example U: for the Network Users Space.
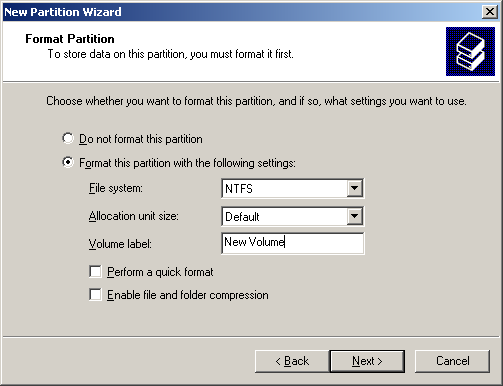
Choose the formatting options for the new partition, and then click next.
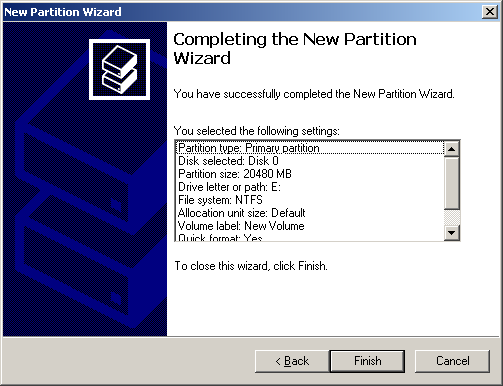
At the end of the Wizard, confirm your choices by clicking the Finish button. The Wizard will now create and format the new partition. Depending on the speed of the disk drive during the formatting, the new disk will be available to use when complete.
Create any additional partitions, by repeating the same process as you have just read. For my system I have used the remaining space to create Partition G:
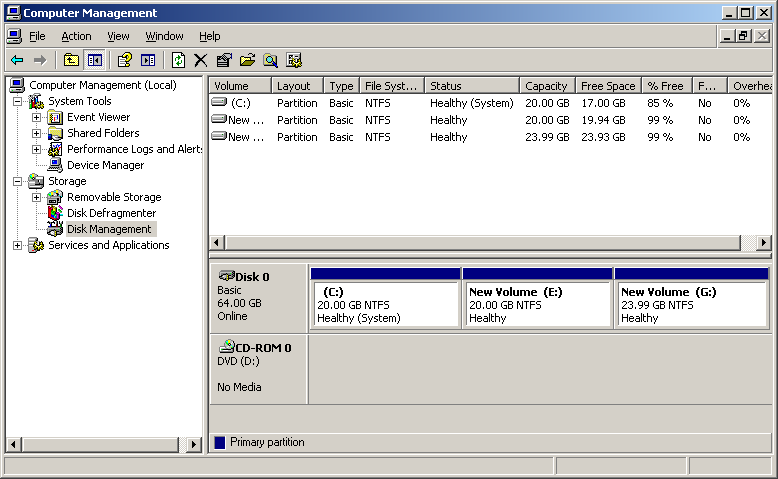
Once the formatting has been completed, the drives will appear in Disk Management and will be available to use.