Configure Server 2012 R2 Server
Once you have installed Windows Server, it is time to configure Server 2012. You will need to perform some common house keeping to make it usable within your network. In this tutorial you will learn how to set the computer name and IP Address. There are a number of methods that can be used to…
Once you have installed Windows Server, it is time to configure Server 2012. You will need to perform some common house keeping to make it usable within your network. In this tutorial you will learn how to set the computer name and IP Address.
There are a number of methods that can be used to configure the computer name and IP address of your new Server. If you can remember any of the shortcuts dating back to Windows Server 2000, you will find that these will still work. However Windows Server Manager (which starts each time that you logon to the Server as an Administrator) gives you an easy dashboard approach to configure Server 2012 exactly how you want it.
I will confess that Server Manager is still a bit clunky and fortunately the cleaver guys at Microsoft have included a command line tool called ‘sconfig.cmd’ which might be a bit more straight forward than using the GUI. We’ll show you how to use both.
Server Manager GUI
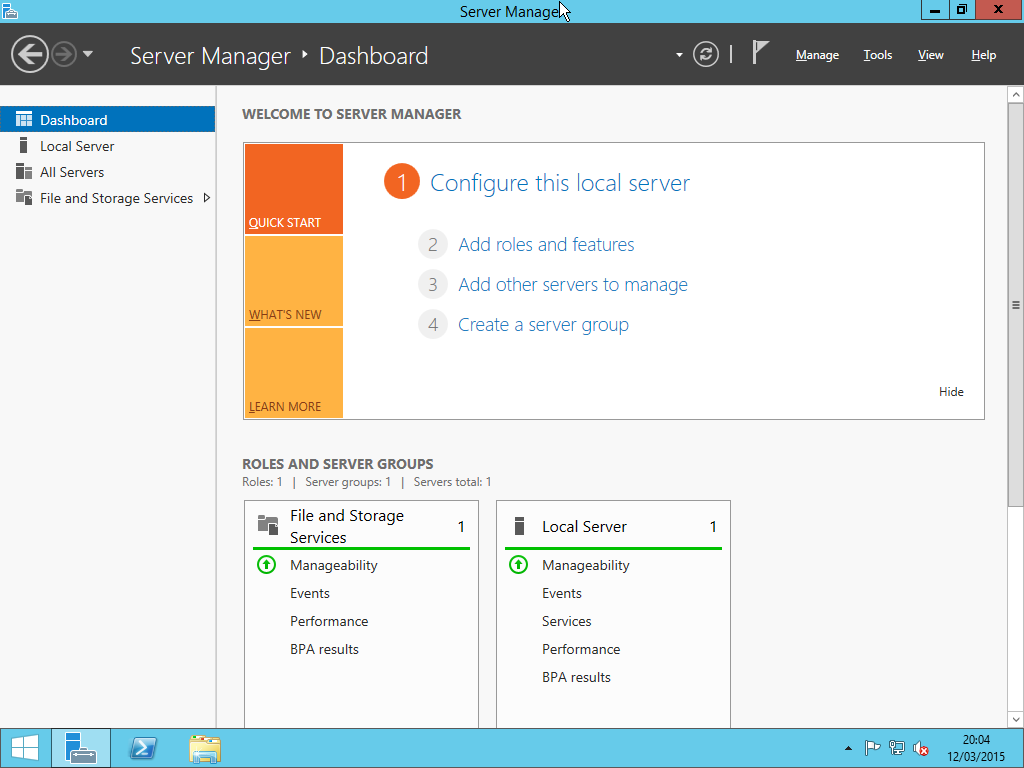
Until you click the “Hide” link, Server Manager will always show you the “Configure this local server” dashboard, since this is where we are going to start, click on the “Configure this local server” link to open the Server Properties page.
To change an item, such as the computer name, click on the Blue Link, this will open the relevant section in Windows so that you can complete the configuration.
Change Computer Name
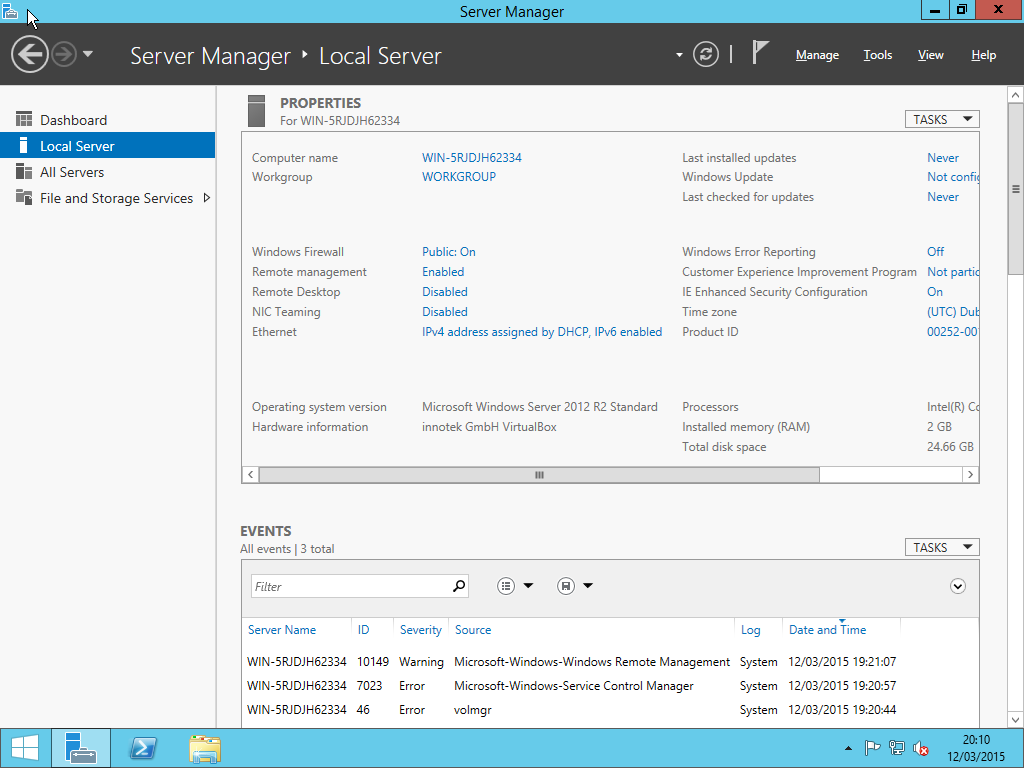
To change the Computer Name, click on the current computer name link, in this screen shot, the computer name is WIN5RJDJH62334, although your computer name will be different.
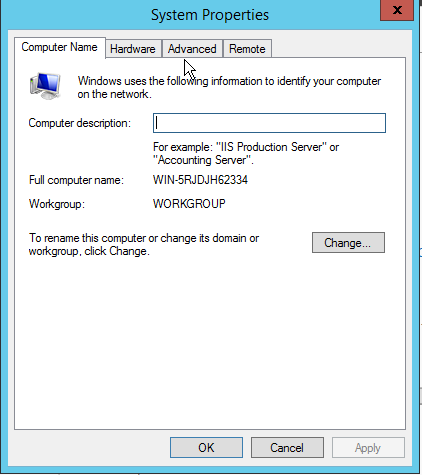
A very familiar screen will then be displayed. Click on the Change button to get to the next screen which where you get to set the name and domain of the computer.
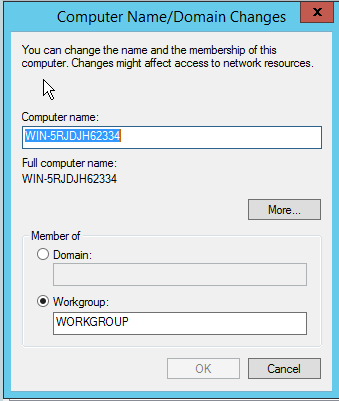
Enter the new name in the computer name box and click Ok. I would recommend not changing the Domain name of the machine at this stage when using the GUI. There is an obligatory reboot when changing the computer name.
Changing the IP Address
Click on the ‘IPv4 address assigned by …’ link to open Network Connections.
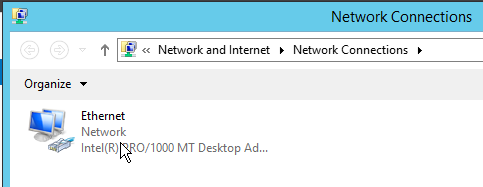
This will display any and all network cards that have been detected by Windows. Right click on the Network Connection that you wish to set the IP Address for and choose the Properties option from the context menu. If you are already a Windows User, you will already be familiar with this screen.
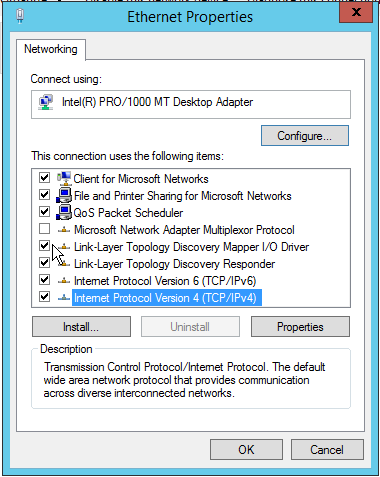
Select the Internet Protocol Version 4 entry, then click the Properties button.
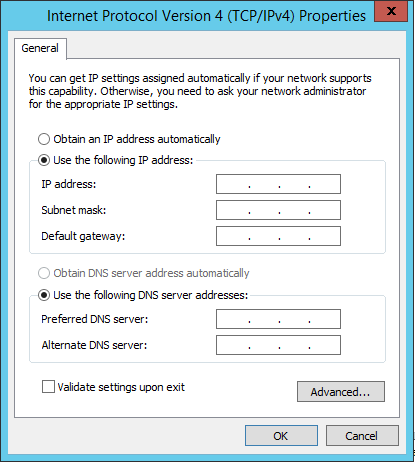
Set the IP address and DNS Servers as appropriate. Note: If you are going to be installing the DNS Role which is required for Active Directory Sites and Services, you will need to enter the DNS Server address of 127.0.0.1
Configure IE ESC
Internet Explorer Enhanced Security Configuration is a feature of Windows Server that aims to make the computer more secure from browser based threats. It will require sites being added to a trusted list in order to allow downloading etc. Not always very useful and not an issue if you are using a filtering proxy service such as Smoothwall. Read more about ESC – https://technet.microsoft.com/en-us/library/cc749261%28v=ws.10%29.aspx

To alter the settings, click the “On” link next to IE Enhanced Security Configuration.
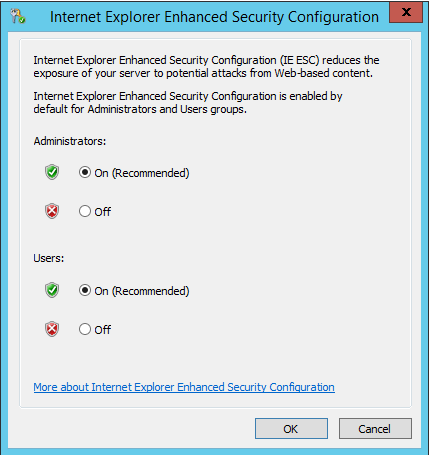
Select the options that are appropriate to your expected server usage.
Configure Windows Updates
Windows Updates are very crucial to the smooth running of your Windows System. Unless you are going to manage Windows Updates using WSUS (Windows Server Updates Service) then I would recommend that you setup Windows Updates to run automatically – or have a patching regime in place to ensure that servers are protected.
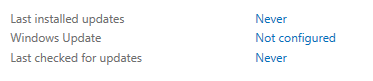
Click the “Not Configured” link to access with Windows Update settings page.
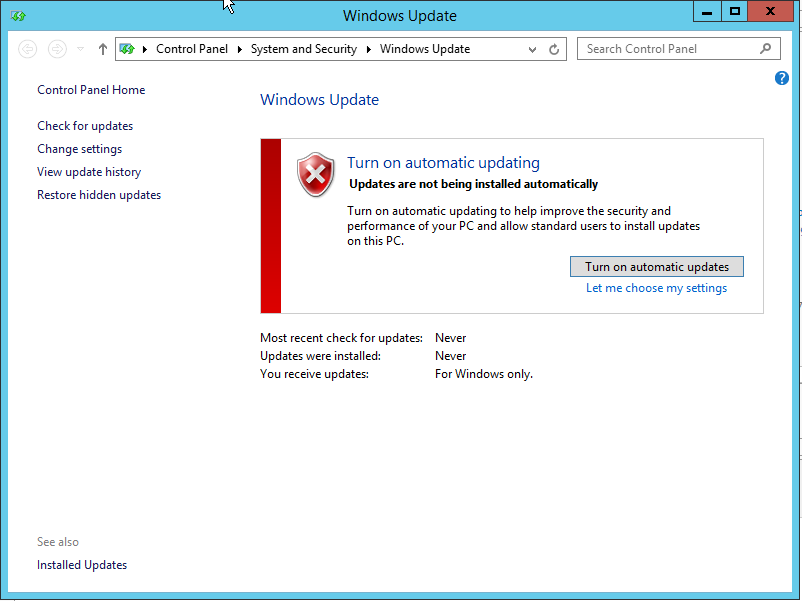
Click the “Turn on automatic updates”. This will trigger Windows to start the checking process. This can take some time (72 updates at time of writing).
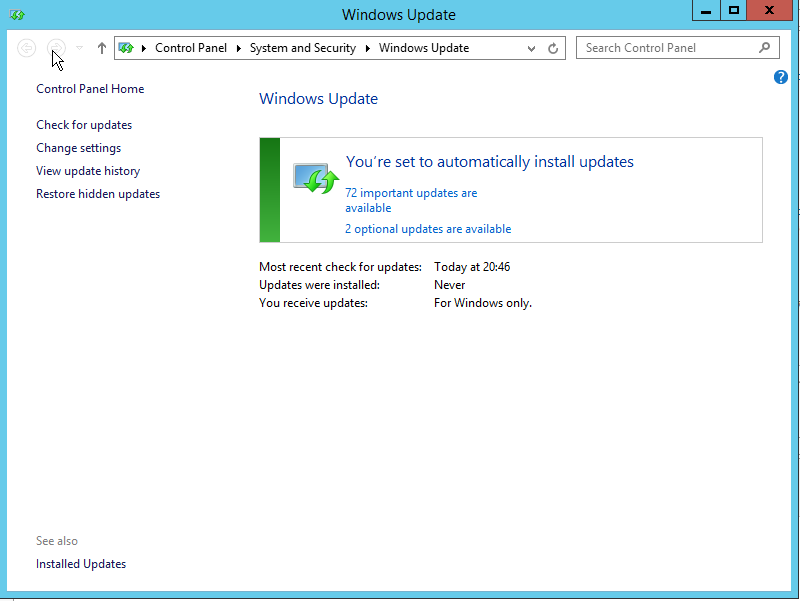
Click on the link ‘xx important updates are available’ to show which updates to install.

Select the updates and click the Install button. This will force the updates to take place immediately. You will need to Reboot Windows to enable Windows Updates to fully take effect. Not rebooting will affect further installations of software or additional roles and features.
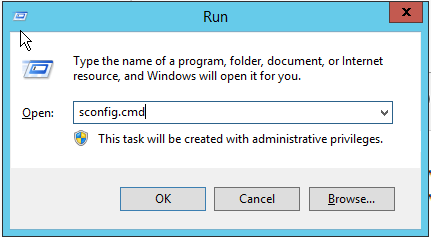
Using the command line ‘sconfig.cmd’
The Server 2012 R2 Update 1 ‘sconfig’ command line app was created by Microsoft specifically for use on the Core version of Windows Server. It works by prompting for a Menu option which is selected via keyboard input. Access the tool by holding Windows Key + R, this will bring up the Run dialog box, then type sconfig.cmd
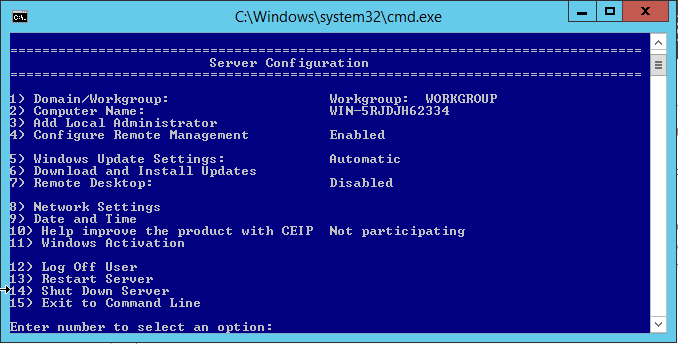
The options are fairly self explanatory and actually useful, for example when you choose Option to change the Computer Name, it will also ask if you would like to Join a Domain.
All of the settings that we configured above can be configured using this tool, with the exception of IE ESC.
Your shiny new Windows Server should now be configured ready for you to add additional roles and services or other software as required.