Configure your Google Chromebook to use a Proxy Server
How to configure a Google Chromebook to use a school/corporate proxy server.
Google Chromebook is a powerful, lightweight, and cheap device that is popular in schools. It is an internet-connected device and connects with the school/campus Google Account. Chromebook is an Internet Browser and thus provides full access to the range of services provided on the Web. Services such as Docs, Sheets, and Mail can all be accessed through the Chromebook. Some web applications will also work offline such as Doc and Sheets. This article shows how to configure your Chromebook to use a Proxy Server.
Many educational campuses will use a content filtering system, this is commonly known as a proxy server. A proxy server is another computer or device that acts as an intermediary between you and the internet. Your requests to the web are relayed through the proxy server which acts as a sort of taxi collecting and delivering a version of the page back to your browser. Proxy servers can also act as content filters ensuring that viruses are removed and forbidden content is not displayed.
In most cases the network or WiFi may be set up with a transparent proxy, this means that you don’t need to configure anything, just connect and go. However, in the case where connect and go facility is not enabled on the internet connection, you may need to specify the address and port of the proxy server on your Google Chromebook.
Configuring the Chromebook to use a Proxy Server
- Startup your Google Chromebook.
- Click the Clock/notification area at the bottom left corner of the screen, select the “Settings” option
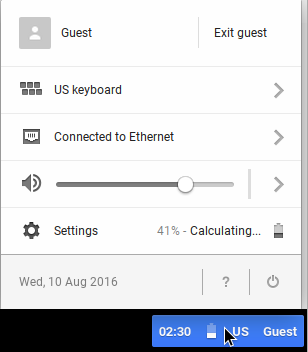
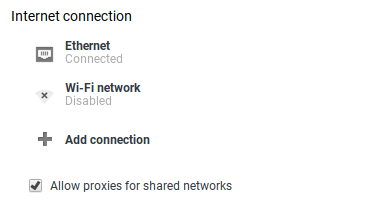
ChromeOS Notifications Area Menu - In the Internet Connections area, select the Network that you are connected to, this can be an Ethernet connection or a Wi-Fi network
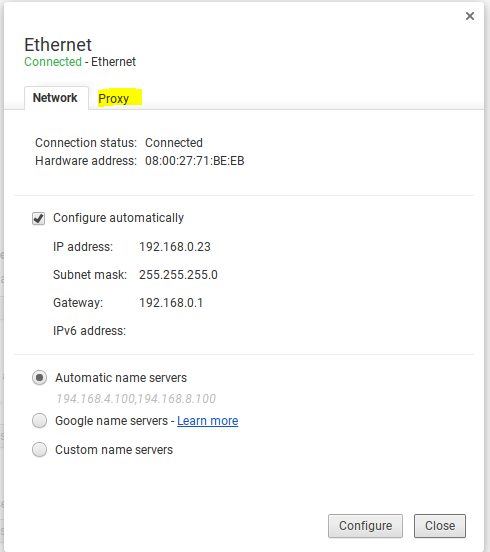
Google ChromeOS Internet connections - Click the Proxy tab
ChromeOS Network Settings/Configuration - Change the setting from Direct Internet Connection to Manual Proxy Configuration,
Check the box “Use the same proxy for all protocols“,
Add the name or IP address of the Proxy Server and then the port as specified by your Network IT Team. 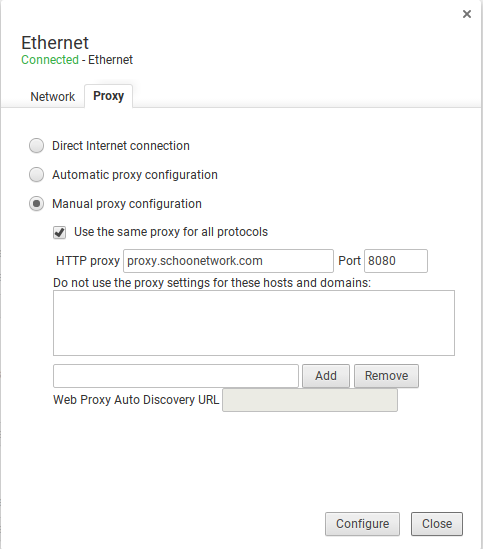
ChromeOS Proxy Server Settings Click Close until all of the settings dialog boxes have closed.